Creating StoryMaps
There are two ways to create a StoryMap: Maps and Gigapixel. For the purposes of this tutorial, the process outlined will be for creating a StoryMap using Maps.
Process
-
Go to https://storymap.knightlab.com/ and click Make a StoryMap.
-
Log in with your Google account.
Note
If you do not have a Google account, sign up at https://accounts.google.com/SignUp?hl=en
-
Once logged in, give your StoryMap a name (in the empty field under Great! Let's make a StoryMap. What do you want to call it?), and then click Create.
After clicking Create, the first slide will be available for editing. The first slide is your StoryMap’s title slide. The title slide shows all points from your other slides.
Creating the title slide
-
Enter a title for your StoryMap in the Headline field.
-
In the empty text box below the Headline field, enter text. In this text box, you have the ability to bold, italicize, insert links, and edit HTML using the buttons provided in the toolbar above the text box.
-
In the Media box, add media. You can add media either by entering the media’s URL into the URL to your media field or by uploading an image.
-
Add a credit for the media in the Credit field.
-
Add a caption for the media in the Caption field.
-
To save your changes, click Save in the upper left-hand corner of the window.
Once your title slide is completed, you may create additional slides.
Creating additional slides
Creating additional slides follows a process similar to creating the title slide, except the additional slides provide the ability to set a location on a map for the slide by searching for a place name, address, or latitude and longitude.
-
To add a new slide, click Add Slide. This will create your new slide.
-
Type the name of a place, address, or latitude and longitude into the location search box. Once you select your location, a pin will be placed on that location for that slide.
-
Enter a title for the slide in the Headline field.
-
In the empty text box below the Headline field, enter text.
-
If you have media to include on this slide, add media. You can add media either by entering the media’s URL into the URL to your media field or uploading an image.
-
Add a credit for the media in the Credit field.
-
Add a caption for the media in the Caption field.
-
To save your changes, click Save in the upper left-hand corner of the window.
Publishing your StoryMap
Once your StoryMap is ready to be published to the public, click “Publish Changes” in the upper left-hand corner of the window.
To access the URL of your StoryMap or its embed code, click Share in the upper righthand corner of the window. Using either the URL or embed code, you can share your StoryMap with others.
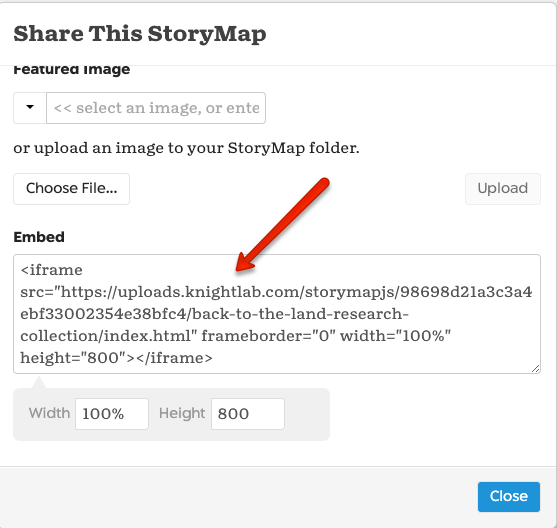
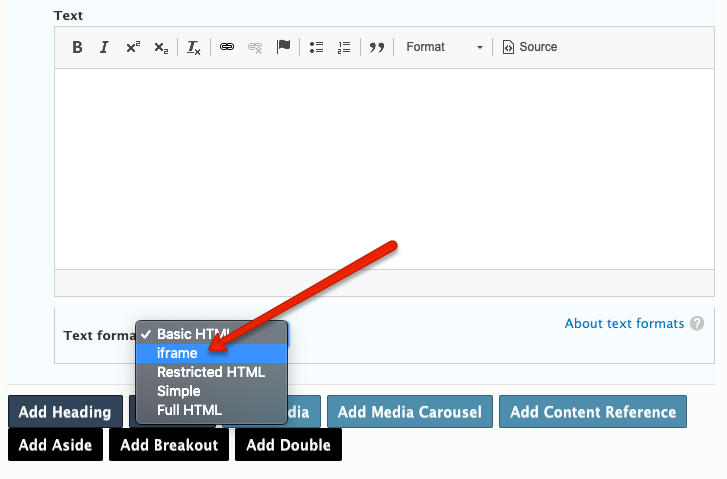
Add StoryMap to Your Narrative
Use the iframe embed code and paste it into your narrative - us the "Add Text" button and make sure to change the "Text format" to "iframe"
Helpful Resources
The following URLs include helpful information for creating StoryMaps but feel free to use additional resources that you may find online and elsewhere.
Documentation
StoryMap – https://storymap.knightlab.com/
Videos
Tutorial – StoryMap JS – Mapping – https://www.youtube.com/watch?v=T-C64JO7lMg
Examples
Genocide Researcher: Rwanda – http://www.genocideresearcher.org/node/5
France Program – http://francophoneafrica.org/
Characteristics of a Scholarly StoryMap
-
Images and other media come from identifiable, authoritative sources.
British Library instead of Wikipedia
Oxford DNB instead of Google Images
Digital Public Library instead of A Random Blog -
Complete citations are provided for each item and text - as appropriate.
-
Use of the media is permissible (e.g., not restricted by copyright or license).